Full Sew In w/L-Shaped Natural Part and Side Bang (Video)

My daughter had a wonderful client that came in to have a Natural Hair Treatment and weave install. I handle all of the hair treatments while my daughter does the installing. The client’s hair had some significant damage that included; missing patches of hair, breakage and a lot of shedding.
The client came with her previous install already taken down so I shampooed her hair three times then applied keratin and potent proteins to her hair; I let both sit on her hair for five minutes. I rinsed her hair then applied a deep conditioner; I covered her hair with the plastic cap, she then went under the dryer on low ionic heat for 20 minutes. After that I applied coconut oil to all of her hair, I also applied more protein and Jamaican Black Castor Oil to her damaged areas. I covered her hair with the plastic cap and let it penetrate into the client’s damp hair for an hour without heat. Once it was time to remove the cap I blow dried the client’s hair.
When I started the process the clients hair was coming out in clumps in the areas where she had a lot of existing hair, by the time I had completed her natural treatment the client had no breakage or shedding of her hair and her hair was soft with great luster and shine. She was then ready to have her hair braided by my daughter.
The client wanted a side bang with an L-shaped leave out. First the leave out position was determined; this area was parted out to the desired thickness. Once that was done the leave out was braided into one big French braid. The client also wanted her hair to fall in her face on both sides so the front braids were braided along her hairline. Due to severe breakage my daughter added additional hair in order to catch the shorter pieces of hair and provide a stronger base in that area. She only applied the hair in that area instead of adding the hair to the beginning of each braid. Her braids were smaller to ensure the client had a stronger and more stable base.
The client brought a weaving cap usually intended for wigs; so I cut the adjustment straps off of the cap; due to the fact that the cap was loose fitting I sewed the cap around the perimeter of the client’s hairline just to keep it in place. There was no need to sew it around her leave out since it would be sewn down during the install. This cap actually ended up being a blessing for the client’s install. The reason is because it was a very sturdy cap with smaller mesh on the top. The mesh and stronger material will keep her shorter hair from breaking from the tension of the weave and will remain protected so it can grow. I also noticed the mesh on this cap made it easier to sew into areas where there was little to no hair.
After I sewed on the cap my daughter installed all of the 14”; she then began sewing the 12” when she got to the ears she brought the tracks up to the front of the clients face creating her side bang each side had three tracks going along the side of the clients face then she continued to follow the normal pattern. She did not cut the tracks on this install.
Once the sewing was complete the excess of weave cap was cut and the client’s natural hair was straightened and blended. Her hair was then layered and styled. She was extremely pleased with her hair!
We also made sure to send the client home with valuable information on caring for her weave and her natural hair while she has her install and how to prepare her hair for her next install.
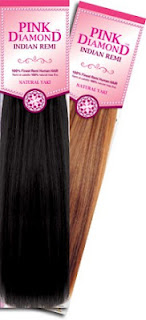
This style used 2 complete packs of Onyx Yaki Human Hair in 14” and 12”.
I hope you enjoy the video!
And…It Is What It Is!

Comments
Post a Comment