Custom Foam/Mannequin Head Stand w/Needle Cushion and Thread Holder (video)

For a long time, I've had this idea in my head to make a customized cushion bar to hold weaving needles and give it as a gift to one of my friends who is a hairdresser. I also wanted it to be able to hold thread; however I never made it.
Well, I decided to make myself a wig that will be sewn onto my head. This is not my first time, I've made one before. You can check out the video here. I remember it not being the easiest task because I was trying to keep the foam head steady in between my legs. So, I had this idea to make a foam head stand that would be good for both foam heads and mannequin heads. In my head, I pictured a paper towel holder that I could stick the head on top of. Therefore, my first stop was Goodwill; there I came across two of them that were exactly what I needed. I purchased the one above first; once my daughter saw mines, she wanted one as well; so I went back and bought the other one.
Below, I am going to explain to you how to make one of your own. This is so super easy and so affordable it will probably only take you about 5 minutes to make a basic one. This cost me $10 to make; however that is because I decided to buy a more expensive pin cushion. The average cost for a pin cushion, (the ones that look like the tomato), I saw at Walmart for $1.77.
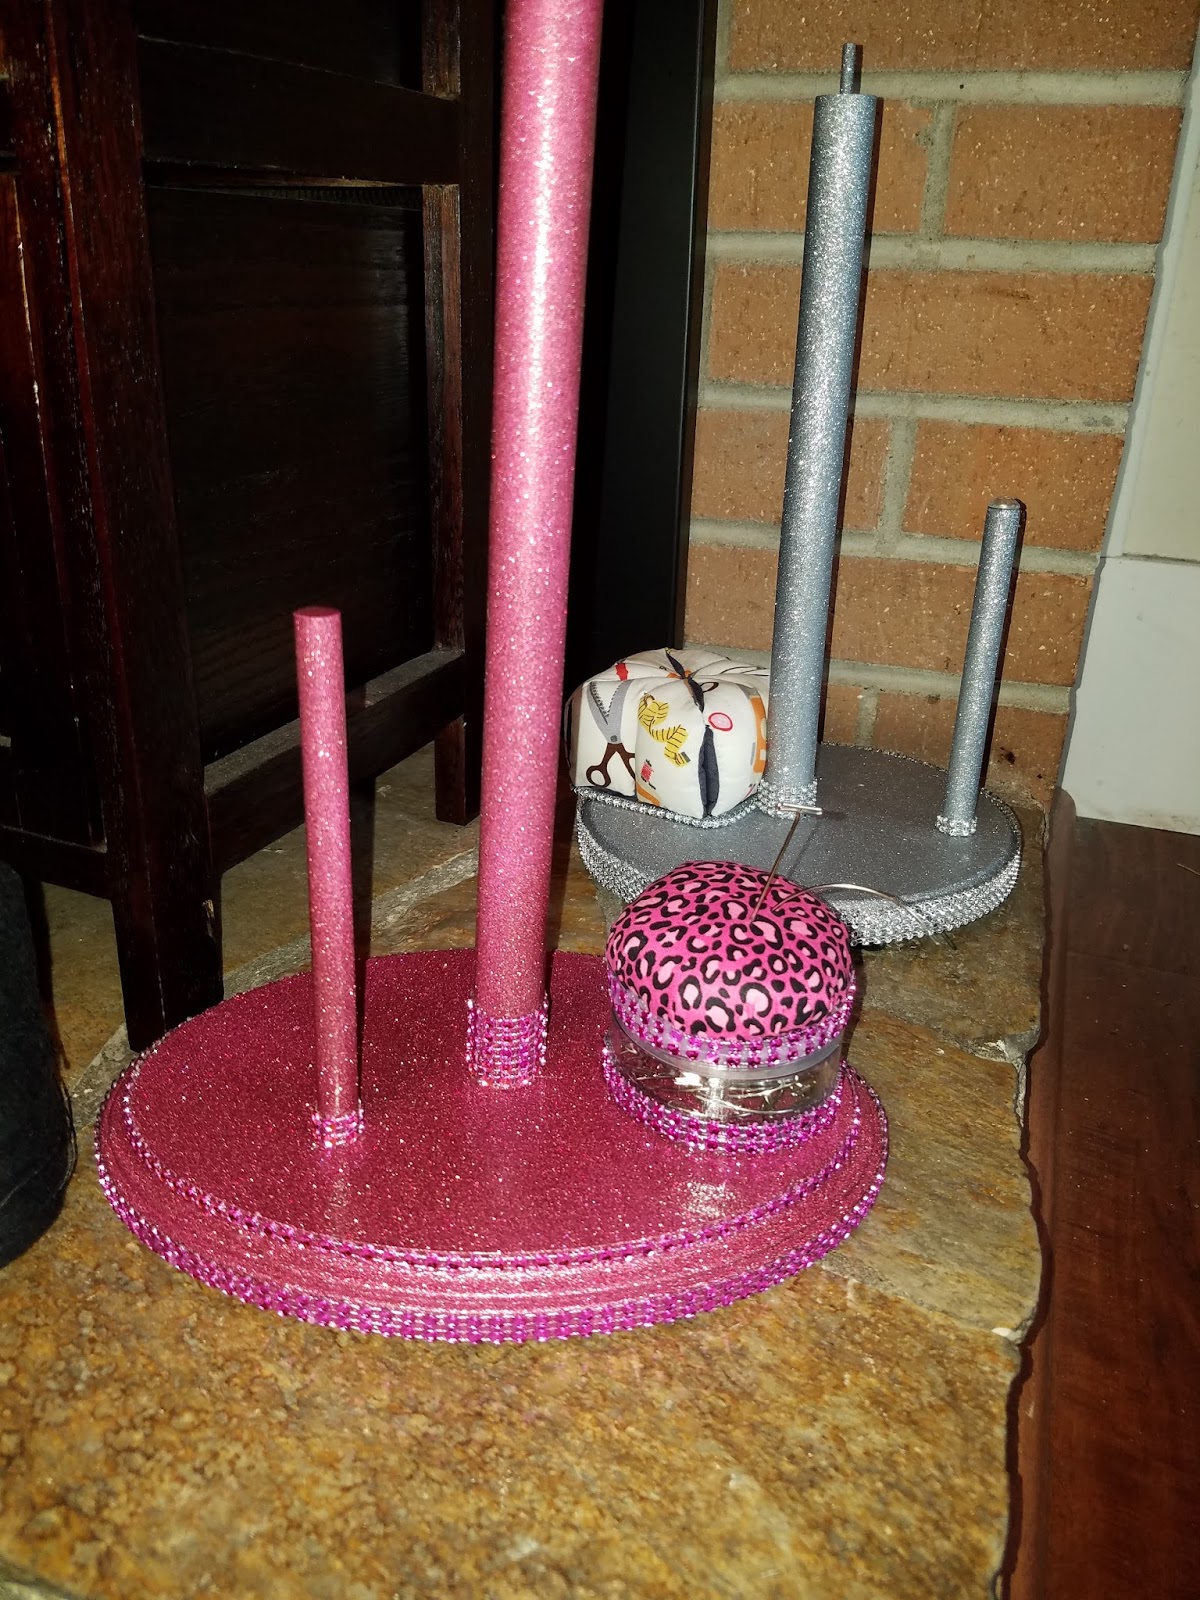
As you can see from the photo above, mines was nothing fancy, so even though it worked absolutely perfectly to make my wig on, I couldn't get past the asthetics. I decided I wanted to Glam it up a little bit; however, this is not necessary and it is a personal preference. For my daughter's, I decided to go for a cutesy look since she isn't really into bling. Also, instead of a
 traditional pin cushion, I added a cute little stuffed kitten to hold her needles. The glam makeover was about an additional $10 each for supplies and I still have some left over for more projects. The average head stand is around $20+ and does not include a thread holder or needle cushion.
I have added tips below on how to customize yours for a unique and/or glamorous look. Even though it will cost a few more dollars to do so; it will be worth it.
As you can see from the photo above, mines was nothing fancy, so even though it worked absolutely perfectly to make my wig on, I couldn't get past the asthetics. I decided I wanted to Glam it up a little bit; however, this is not necessary and it is a personal preference. For my daughter's, I decided to go for a cutesy look since she isn't really into bling. Also, instead of a

I have added tips below on how to customize yours for a unique and/or glamorous look. Even though it will cost a few more dollars to do so; it will be worth it.
Instructions
1. Unscrew the ball from the top of the paper towel holder (if it came with one).
1. Unscrew the ball from the top of the paper towel holder (if it came with one).
2. Wipe down the entire paper towel holder with some rubbing alcohol and a paper towel and allow it to dry.
**If your base does not have any kind of rubber on the bottom to prevent sliding, you can add your own by using the rubber
 shelving or the rubber coasters, available at Dollar Tree. After step 2. Using spray glue, attach the rubber to the bottom of your base, spray glue will not seep through like other glues will. Allow the bottom to dry completely before moving to step 3.
**If your base does not have any kind of rubber on the bottom to prevent sliding, you can add your own by using the rubber

3. Once the base is dry, apply a generous amount of glue to the bottom of your pin cushion.
Place the pin cushion on the base of your paper towel holder. You want to do this so that the pin cushion does not move around.
4. The bottom of your foam/mannequin head has a hole, use this to place the foam head on the center pole of the paper towel holder.
5. The smaller pole is for your weaving thread.
5. The smaller pole is for your weaving thread.
And you are done.
*Customizing Tips*
1. Cover your base with fabric. If yours is like mine, all you have to do is unscrew both poles, lay your material face down, lay your base face down on top of your material, glue the cloth to the bottom of the base and allow it to dry. Once it has dried, use a philips screw driver to poke a small hole through the fabric into the screw hole, then screw your poles back in, directly through the fabric.
2. Spray paint it. After Instruction Sstep 1. Unscrew all poles. Using 220 grit sandpaper, lightly sand all parts to create a rough surface. Use alcohol and a paper towel to wipe off any excess dust and dirt. Spray paint all parts separately, including the bottom of the base. Once dry, screw all pieces except the ball back in place. *If there are rubber tips on the bottom, cover them with tape before painting.
 3. Glam it up. Follow Tip 2. However, Do Not screw pieces back together yet. Using a base color spray paint that matches the glitter paint you choose, apply two coats (i.e. for silver glitter use a silver base paint). Once the second coat is dry apply two coats of glitter blast paint. Once that has dried apply 2-3 coats of glitter blast sealer. After the paint has dried, apply glue along the outer edge of the base, then apply a bling strip or stones for a blinged-out look. Once dry, screw all pieces except the ball back in place.
4. If you really want something unique, instead of just having a pin cushion, add a small jar with the pin cushion on top. You can use the jar to store your needles.

4. If you really want something unique, instead of just having a pin cushion, add a small jar with the pin cushion on top. You can use the jar to store your needles.
**UPDATE**
I recently went and got my hair clipped by a friend of mine, who is a beautician. She did not charge me, so I decided to return the love by making her a custom stand. The best part about it, is whenever she's not using it to make a wig she will be able to use it as a thread and needle holder when she sews in weaves.
I searched Goodwill, Walmart, and Big Lots for a wooden paper towel holder and none of them had one. I decided to go to Hobby Lobby and see if they had any supplies to make one from scratch and they did. I purchased one 7/16×36 dowell, one 7/8×36 dowel, one 7x9 oval base, one can of Krylon Short Cuts Hot Pink and one can of Krylon Glitter Blast Posh Pink. I decided to go with the oval base because their round bases were too small. I am actually glad that I did because it gives this one a unique look. After that, I decided to head over to Lowes and have them cut the dowels for free. Each dowel was cut into three 12 inch dowels. I actually needed the smaller dowels to be cut into 6 inch dowels; however, the guy said that the 6 inch dowels would get stuck in the machine; so when I got home I used a hacksaw to cut them into 6 inch dowels. Instead of just a regular pin cushion, I decided to add a jar that can hold the pins and needles inside with a pin cushion as the lid. I did not buy the pin cushion, I made it custom. All of my stands moving forward will come with this. Also, after having the dowels cut, I have two extra big dowels for two more stands and 5 extra small dowels. I will use two of the small dowels to make another head stand and the remaining three to make weaving stands, that only hold your thread and needles. If you would like to see these and future stands in more detail, follow my page Glamour Stands on Instagram.
If you are not into making wigs and you do not need a wig stand, but you are into weaving hair or even crafts, you can make a stand that does not include the larger dowel in the middle.
If you are not into making wigs and you do not need a wig stand, but you are into weaving hair or even crafts, you can make a stand that does not include the larger dowel in the middle.
Since you may run into the problem of not being able to find a wooden paper towel holder, I am going to go through the details on how to make your own stand from scratch. This will be how I actually made my own; you can make any changes you want to. I'm only going to go over how to construct the basic design; follow the directions above to complete and customize it. I realize that not everyone has tools laying around their house like I do, so there may be a few more expenses for you if you do decide to make your own. I am willing to make any stand you would like. You can order here: https://www.etsy.com/shop/DejidaiDesigns
Supplies
1 7/16×36 Wooden Dowel, cut into 12 inches
1 7/8×36 Wooden Dowel, cut into 6 inches
1 Wooden Base, 8-10 inches (any shape, make it unique)
Gorilla glue
1 1/2 inch nail
1 1/4 inch nail
1 styrofoam block
220 grit sandpaper
Instructions
Using 220 grit sandpaper sand any rough edges on all of your pieces.
Flip your base and find the center, mark it. Make another mark that is 2 inches from the edge of your base.
Using a drill, slightly drill holes where you made your marks, just enough to cover your nail heads. (If you don't have a drill or drill bits place your nail head down and trace the head of the nail with a pen or pencil making a circle. Using a sharp knife, blade or flat head screwdriver, scrape out the area in between the circle you made, just a little bit. Nail heads are flat so you do not need to make it deep. It does not need to be perfect because you will be covering it).
Grab your styrofoam and put your base on top of it. Use a hammer to nail the 1/2 inch nail into the center of your base, through the styrofoam. Do the same thing with the 1/4 inch nail for your other hole.
Now lift your base off of the styrofoam and flip your base over and you should have two nails sticking out of the top of it.
Make sure your base is on a flat surface.
Pour a few drops of Gorilla Glue over the nail so that it drips down onto the base, around the nail.
Mark a hole in the center of each of your dowels, it is best to do this on whichever side of the dowel is more raggedy or rough.
 Place the small dowel on top of the nail that is closer to the edge, directly where you made your mark. Using your hammer, hammer the top of the dowel onto the nail. Now place the large dowel on top of the center nail, directly where you made your mark. Using your hammer, hammer the top of the dowel onto the nail.
Wipe any excess Gorilla Glue that may have seeped through from around the dowels and base with a paper towel or rag. Allow the glue to dry completely before you move on to the next steps. Once the Gorilla Glue has dried, if there is any excess glue, make sure you use something to scrape it off.
At this point, you can add your pin cushion and start to use it or you can customize it, using the customizing tips above, then add your pin cushion.

At this point, you can add your pin cushion and start to use it or you can customize it, using the customizing tips above, then add your pin cushion.
And...It Is What It Is

Comments
Post a Comment